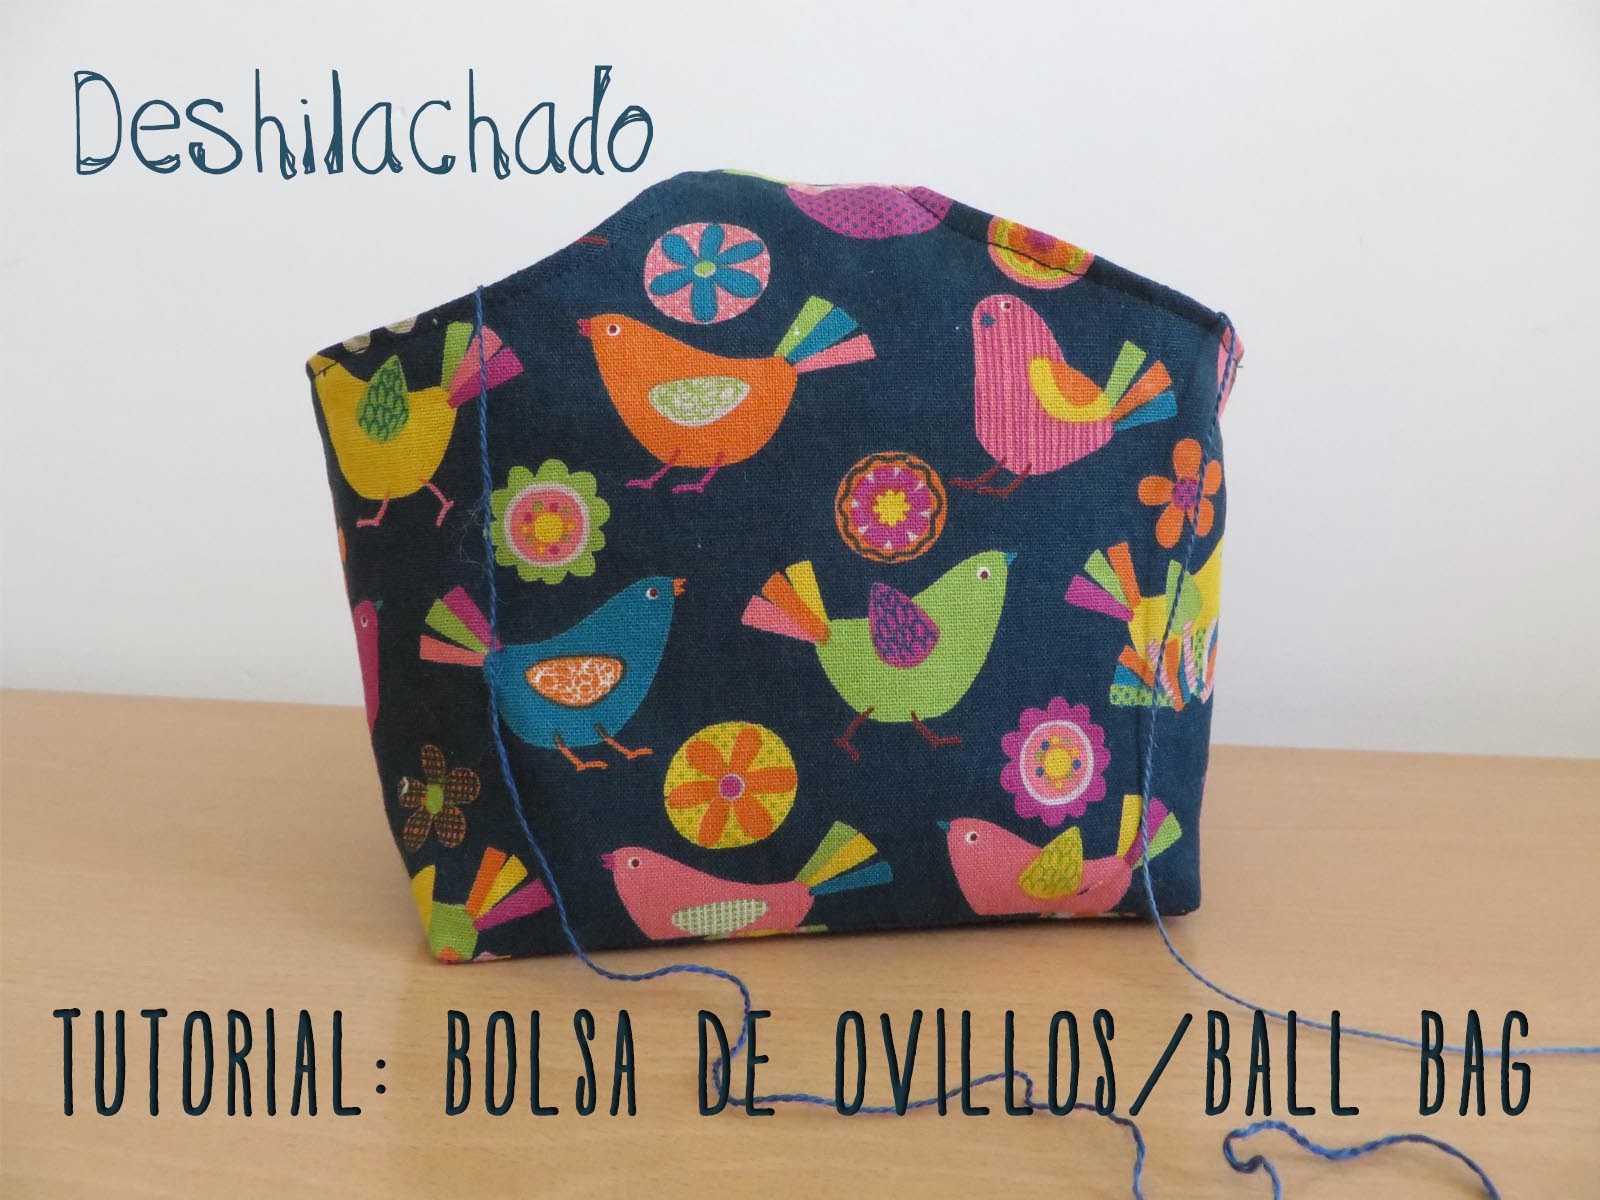
Sunny, mi amiga y compañera en The Crafty Room, y yo siempre vamos con la bolsa de la labor a todas partes. Hace unos meses nos tomábamos un café y sacó dos botes de cristal porque estaba tejiendo con dos ovillos a la vez. La idea es muy buena, pero pensé que le tienen que pesar mucho. Así que le he hecho una bolsa para meter los ovillos y poder tejer sin que se enreden (el asa está en medio y por cada agujero sale un hilo).
Sunny, my friend and partner in The Crafty Room, and I always carry the bag with our needleworks everywhere. A few months ago while we were having a cup of coffee she took two glass jars out because she was knitting with two balls at the same time. It is a very good idea, but I thought that sure they are too heavy. So I have made for a bag to put the balls inside and so knit without they get tangled (the handle is in the middle and a thread goes out through every hole).
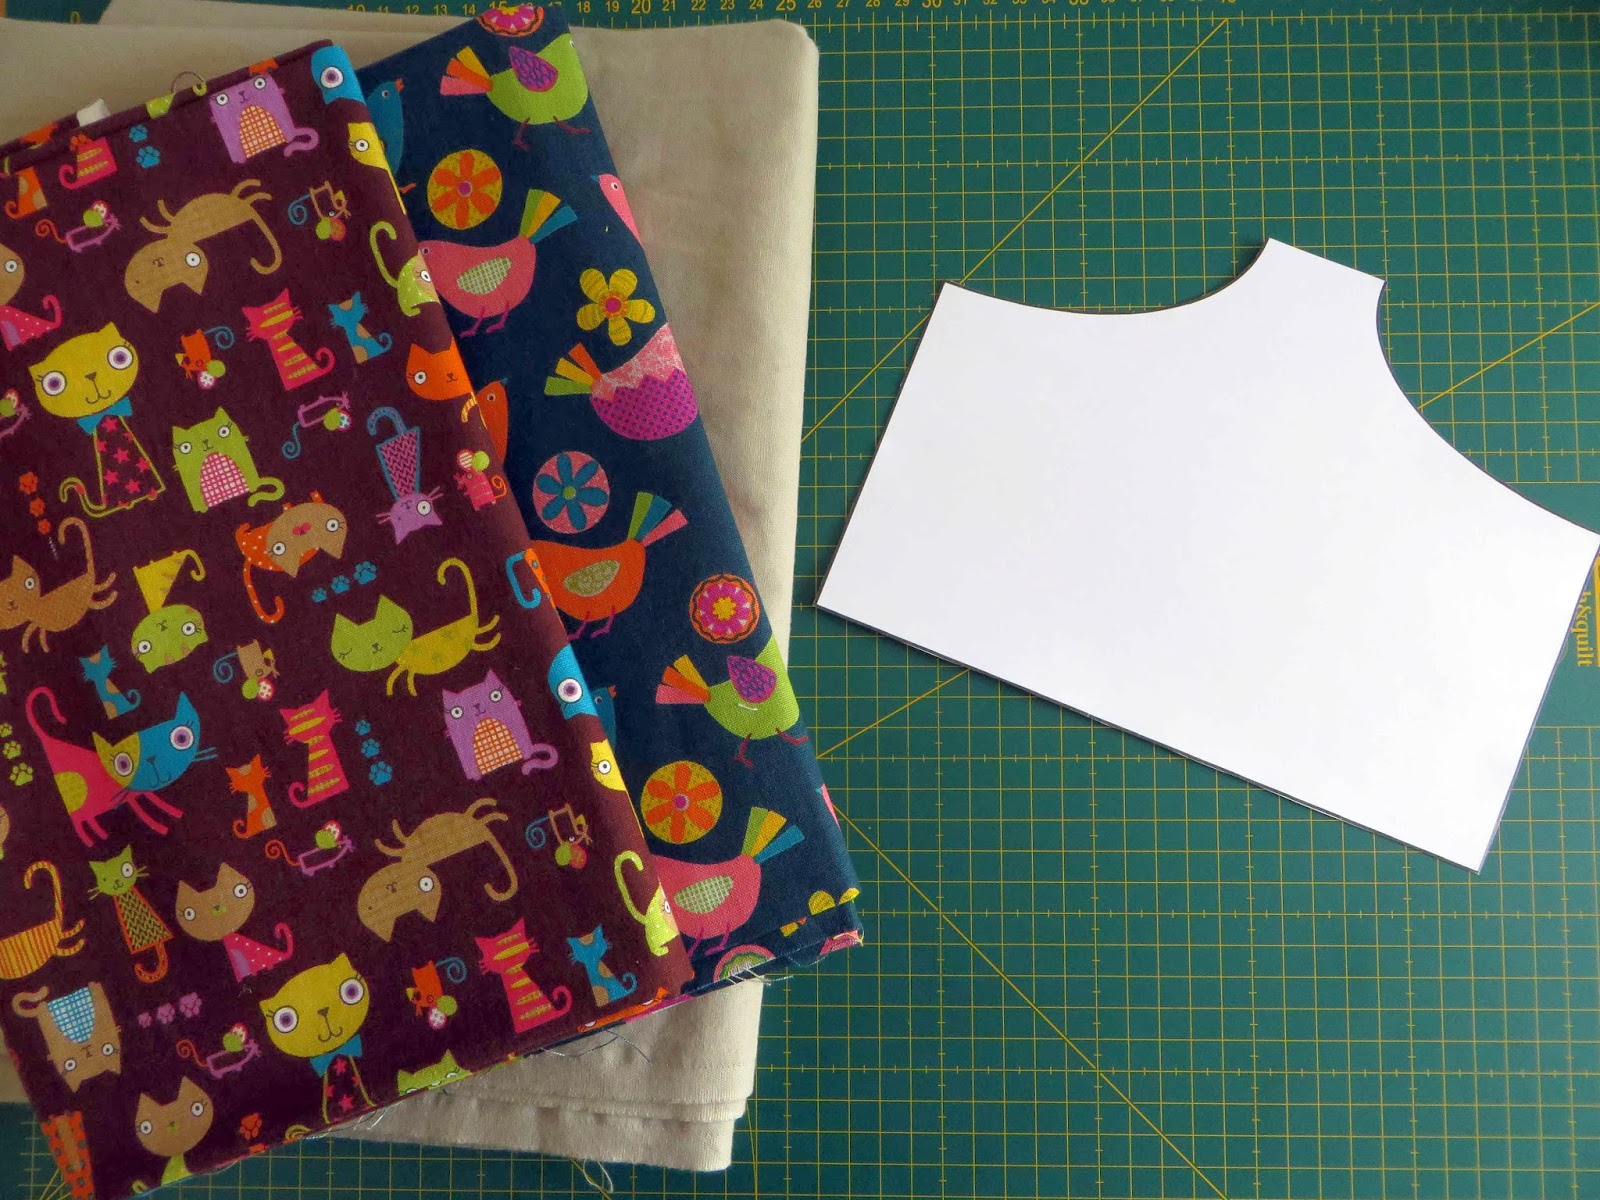
Necesitamos tela para la parte exterior y otra como forro, además de entretela un poco gruesa que dé cuerpo a la bolsa. Yo he empleado lino, aunque podéis usar otros tejidos, pero que no sean muy finos. Las plantillas la podéis descargar aquí.
We need a fabric for the outside and another for the lining, besides some interlining a little thick to give shape to the bag. I have used linen, though you can use other fabrics, but not too thin. You may download the templates from here.
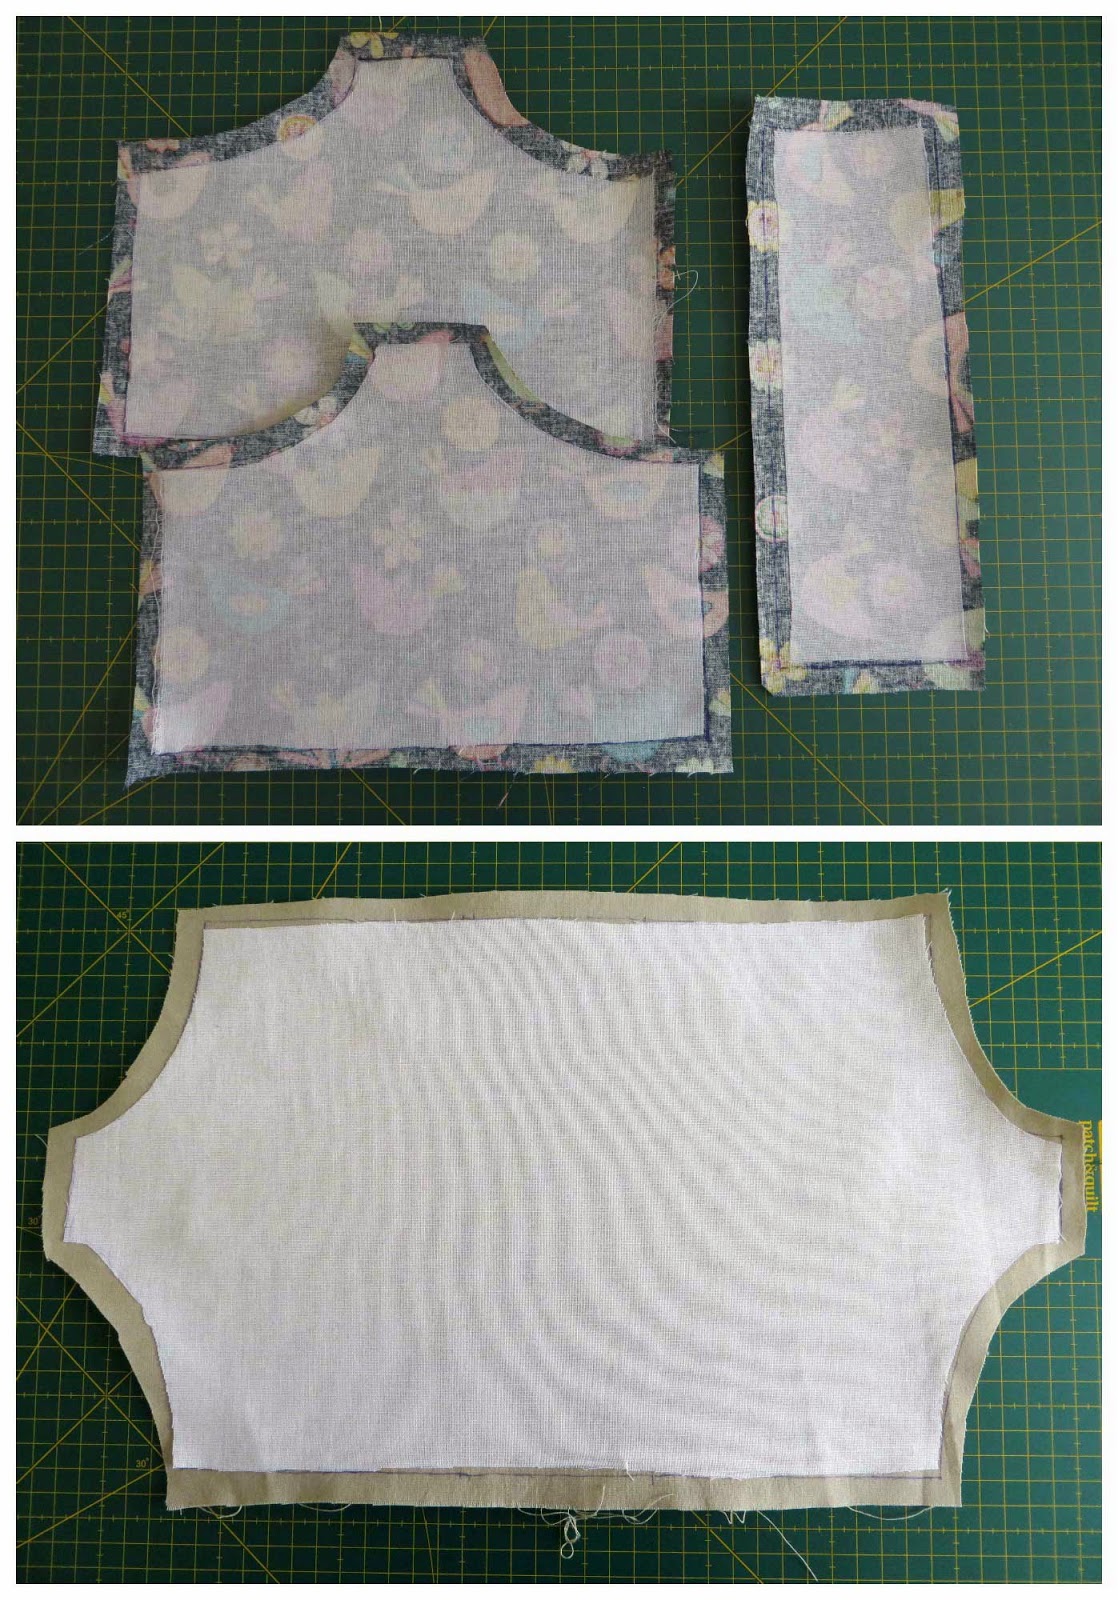
1– El patrón tiene tres piezas: la A es el lateral de la bolsa, la B la base y la C el bolsillo. Cortamos de la tela exterior dos piezas A, una B y una C, de la tela interior una sola pieza compuesta por A + B + A. Y las mismas de entretela salvo para el bolsillo. La entretela que se pega con calor es muy cómoda de usar. Si la utilizáis es el momento de ponerla con la plancha.
1- The pattern has three pieces: A is the side of the bag, B is the base and C the pocket. Cut two pieces A, one B and one C of the outside fabric. And one only piece made up of A + B + A of the inside fabric. And the same ones of interlining except for the pocket. The interlining that sticks with heat is very easy to use. If you use it, is the moment to put it with the iron.
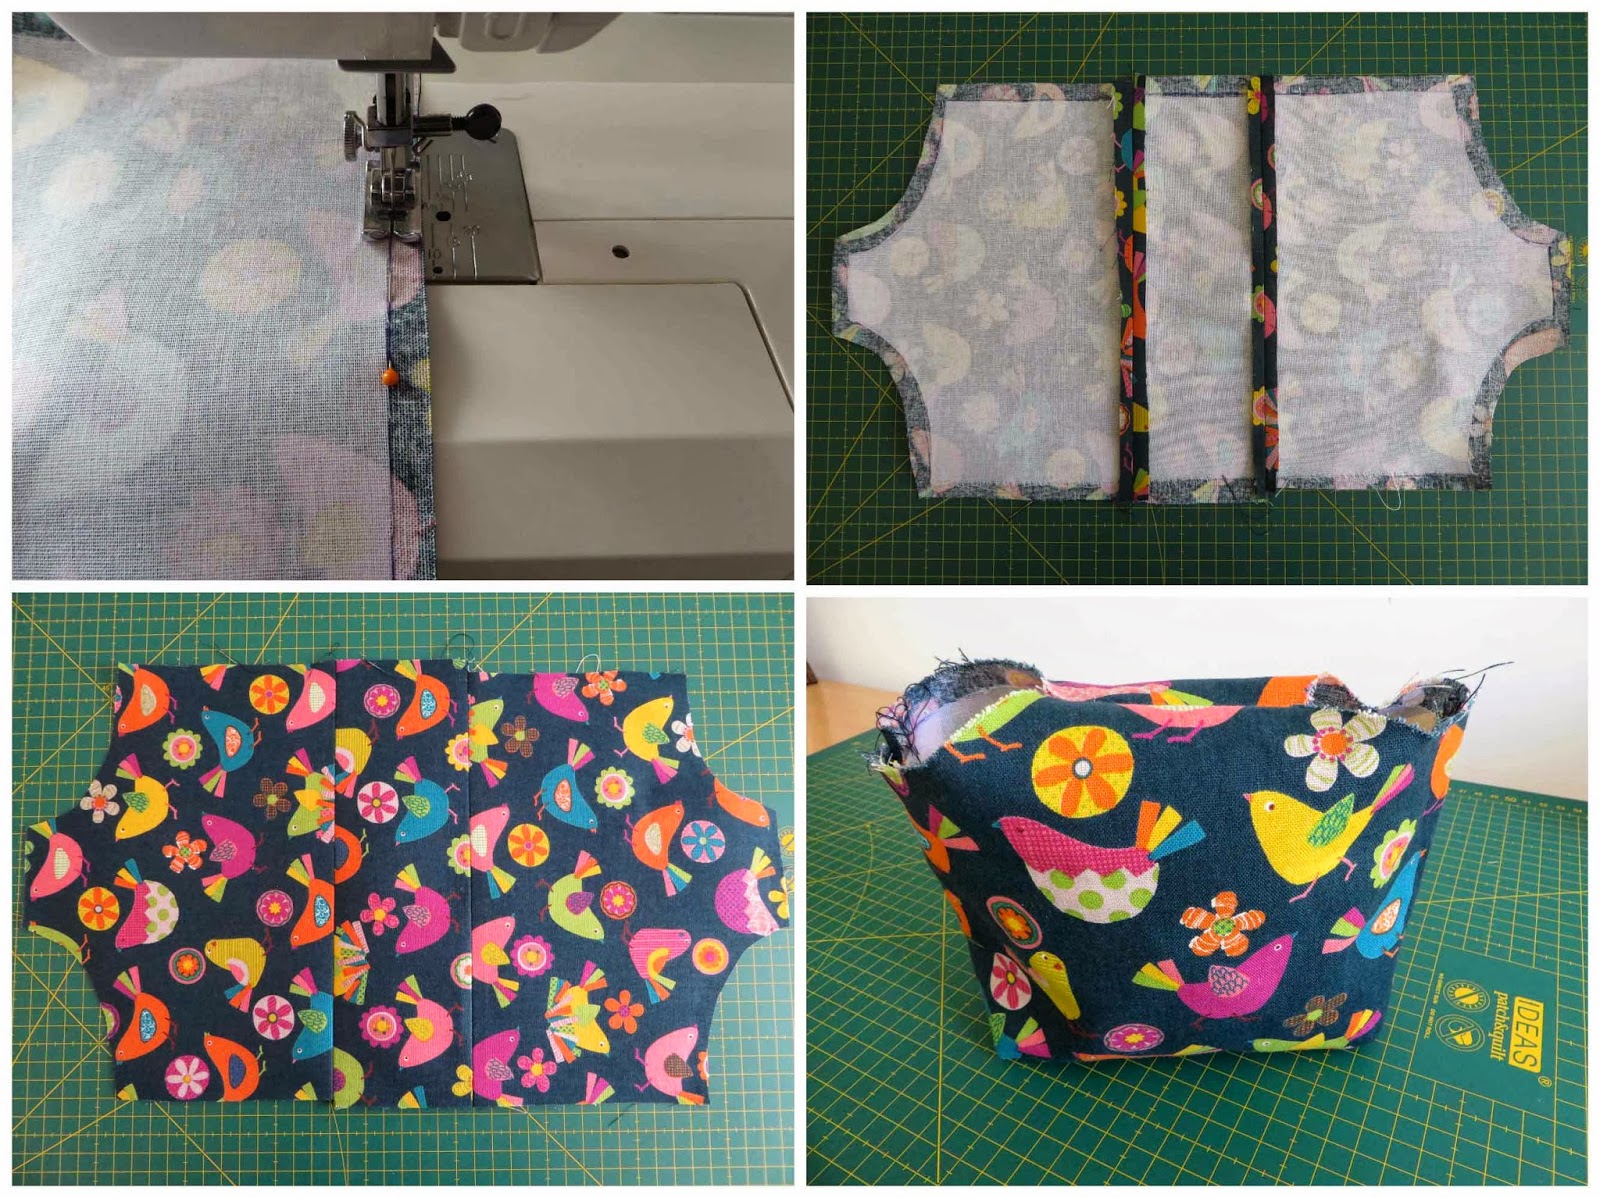
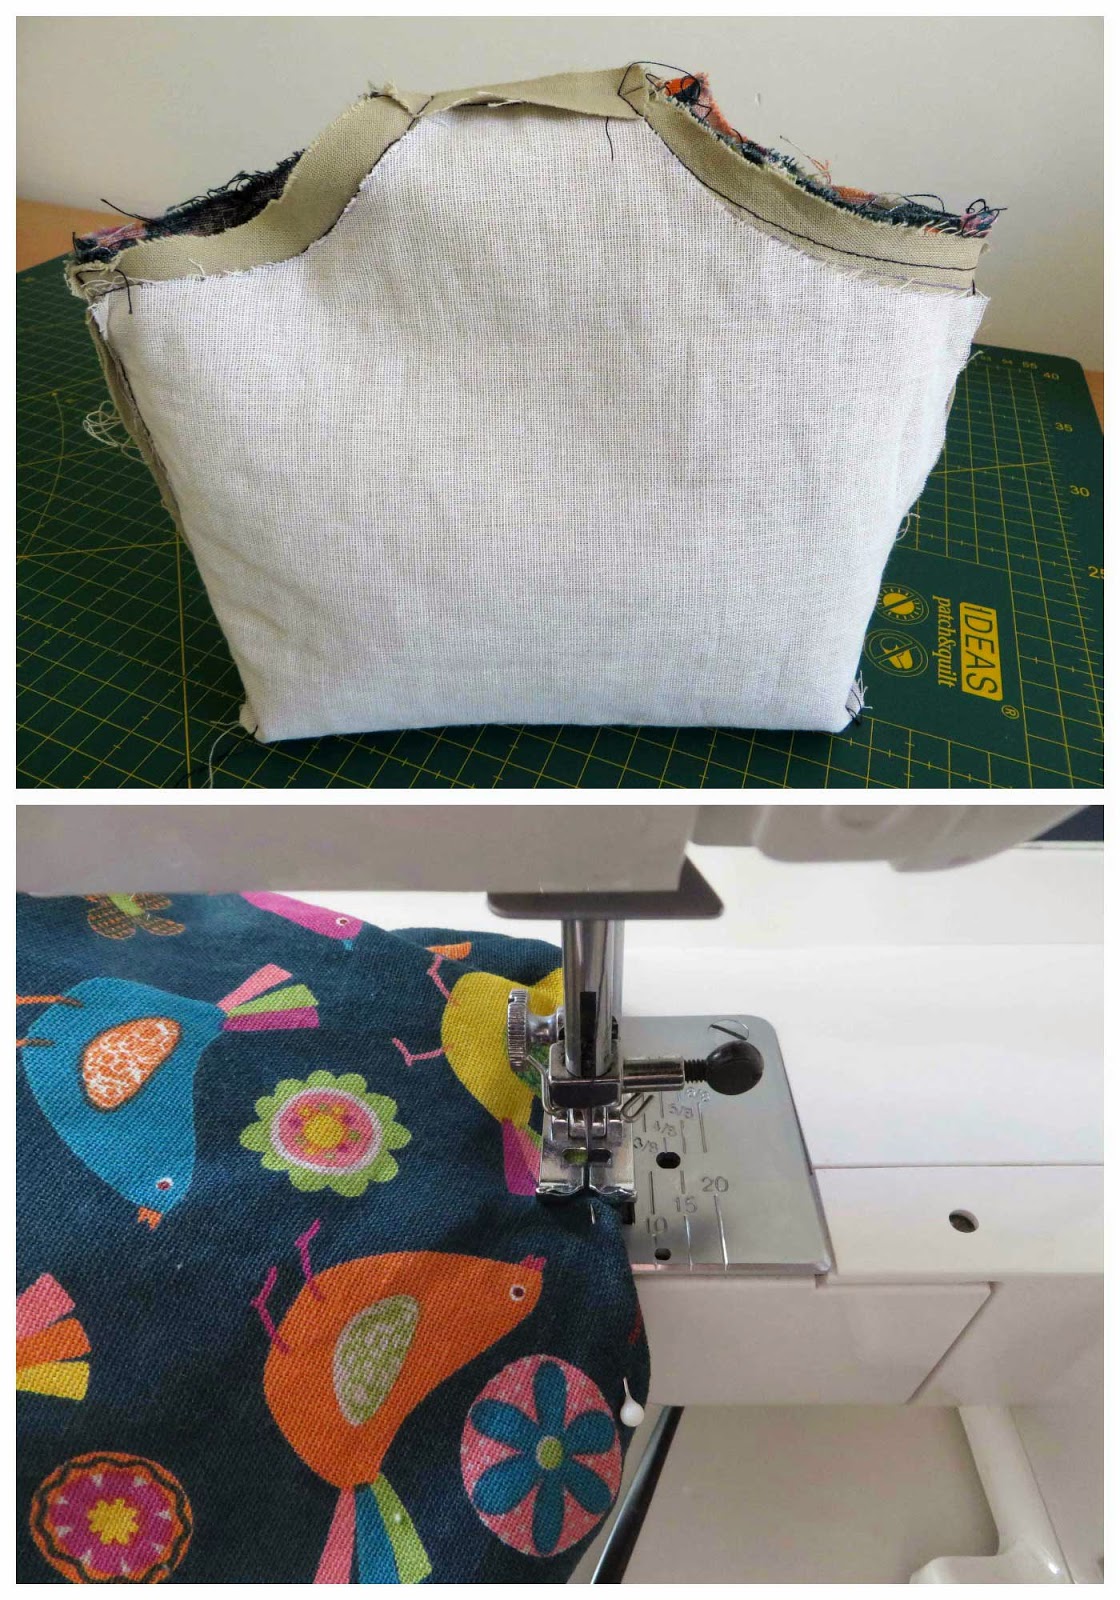
2– Primero montamos el bolso con la tela exterior cosiendo las piezas, incluida el asa.
2- First assemble the bag with the outside fabric sewing the pieces, including the handle.
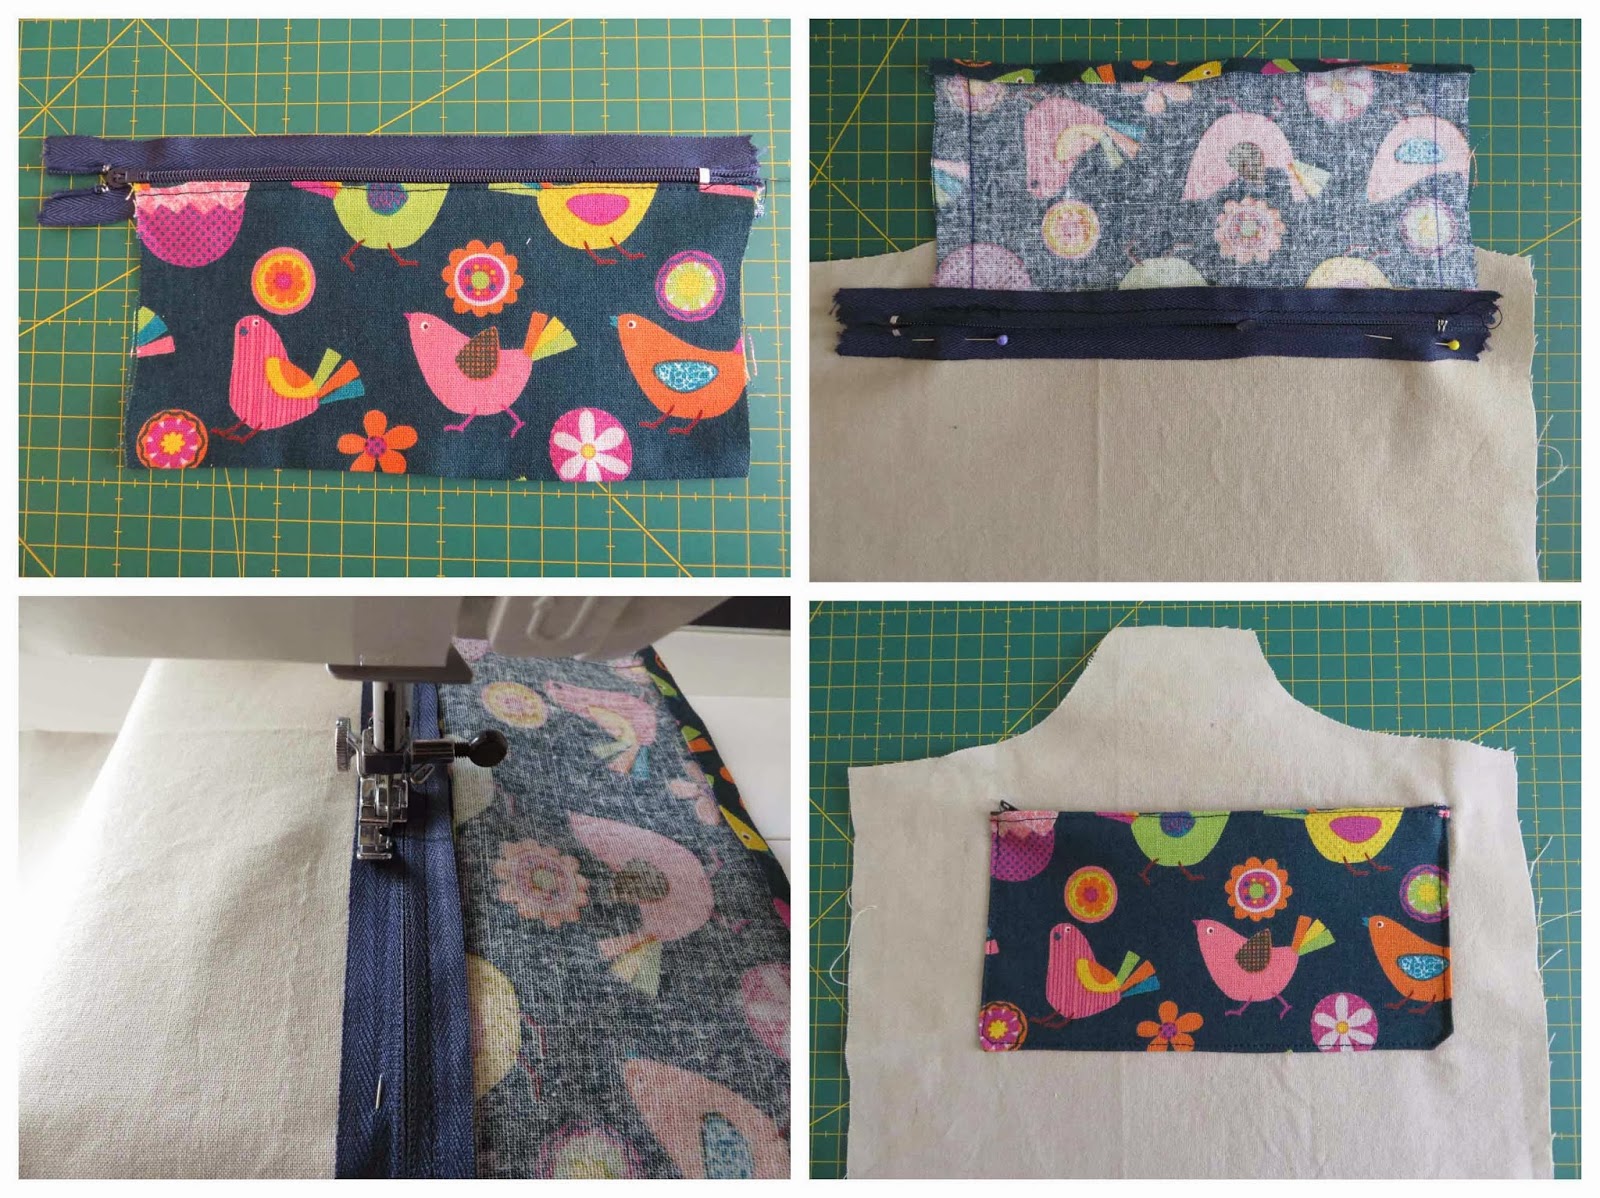
3– A continuación, hacemos el bolsillo. Como es para meter pequeñas cosas, como marcadores y agujas laneras, le he puesto cremallera.
3- Next, make the pocket. I have added a zipper because inside there will be small things, as markers and wool needles.
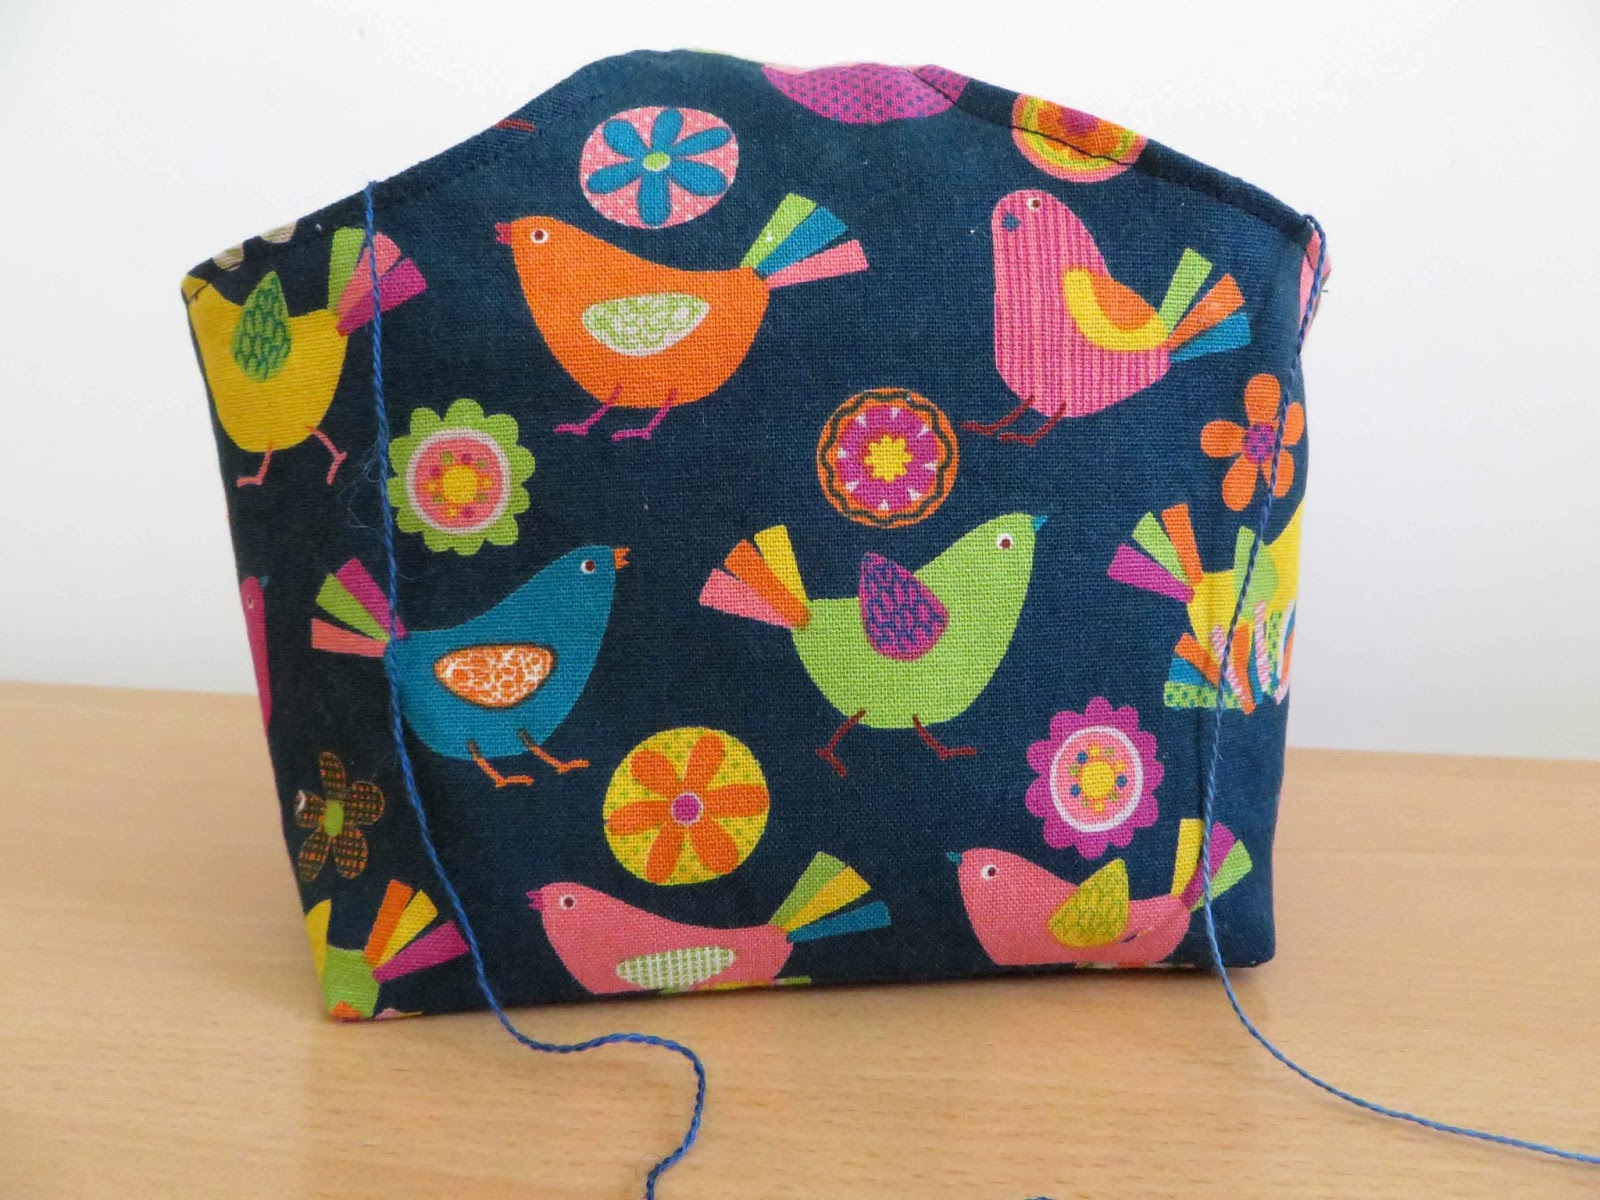
4– Finalmente, montamos el forro de la misma forma que la tela exterior, lo colocamos dentro de la tela exterior, sin darle la vuelta, y unimos ambas partes por el borde, tras haberlas planchado con dobladillo.
4- Finally, assemble the lining in the same way as the outside fabric, place it inside the outside fabric, but do not turn the inside out, and join both parts by the edge, after having ironed them with hem.